Showing posts with label tutorial. Show all posts

Friday, April 5, 2013

Tutorial(ish): Ombre Over-dyed Bag

So I recently decided that I wanted a new purse.  I am really into designing/making my own bags so I decided that making my own bag was certainly in order.  While I have actually designed my last few bags, I stumbled across a pattern and tutorial that I really liked so I decided to go that way with a few key alterations.  The pattern and complete directions can be found on the Warehouse Fabrics blog---> HERE  Now, onward and upward.

To accomplish the look I wanted, I used a process called over-dying.  The definition, in the captain obvious fashion, is to dye over top of an already existing pattern.  In this case, I was dying over a black on white arabesque print.  The fabric I used was also 100% cotton meaning it takes dye fairly predictably.  Awesome.  So let's talk about what I actually did.


Materials Used

-1/2 yard exterior fabric (printed cotton duck)
-1/2 yard interior fabric (magenta broadcloth) 
-1/4 yard yoke fabric (black canvas) 
-2-1/2ish yards fusible interfacing (I keep a crap ton of this around the house at all times) 
-1/2 yards fusible fleece
-2 yards black cotton strapping (adjust for your desired strap length)
-Approximately 2-1/2 yard piping (I used about 1 yard of the black and 1-1/2 yards of the pink)
-1/2 bottle RIT dye in fuchsia
-salt
-plastic container you don't mind losing
-rubber gloves
-dowels or something similar (like a yard stick) 

Step One- get the shrinkage out of the way

Prewash, dry, and press all your fabrics.  Just do it.  I've never regretted doing it but I definitely HAVE regretted not prewashing (like the time I turned a cape for a friend pink.  True story).  

Step Two- Making sure our nerves (and bag) don't get too frayed

Cut out the pieces of your pattern per the directions.  Here is where you will want to deviate a little though.  The outer fabric, which you will be over-dying, is going to be washed again.  Cotton duck LOVES to fray so you will want to make sure that after the process is over, you still have fabric to work with.  I traced my pattern with my dressmaker's marker, then traced a half-inch perimeter around that to leave room for fray.  I then cut out my outer line, and then stitched along the inner line.  This line of stitching will help prevent fray.

Lay your pattern over top of your folded fabric and trace using a dressmaker's marker (the kind that will go away in the wash).  Ignore the shoe sticking out from under my bed.  

Trace a 1/2" perimeter around the outside and then cut on your outside line.  

Once you are all cut out, you will want your interior line to continue all the way around so to easily do that, flip the pattern, match it up with what you already drew, and then trace the other side.  Baste stitch over that line.  

Step Three- Curl up and (dip) dye 

There are dozens of detailed tutorials out there on ombre dying techniques.  I'll give you the low down but if you have problems, consider looking up a tutorial online with better instructions.  

1.  Pour 1 cup of salt into your dyeing bin.  Add in three gallons of hot water (at least 165 degrees), and then pour in half a bottle of RIT dye.  Stir it up.   
2.  Use a dowel to suspend the fabric into the dye.  Allow the bottom third of the fabric to go into the dye and set a timer for fifteen minutes.  Swish the fabric around every few minutes.  
3.  When the timer goes off, allow the second third of the fabric to go into the dye.  Set a time for ten minutes and swish the fabric around a few times to prevent really harsh lines.  
4.  When your second time goes off, dip the next few inches of fabric in and out a few times to get a darker shade and blend the edge.  Then dip the whole piece in once and immediately pull it out.  
5.  Rinse your fabric pieces, holding the lightest shade at the top at all times.  The allows the excess dye to flow through the fabric from lightest to darkest.  
6.  Rinse thoroughly in cold water.  When rinse water runs clear, hang to dry for a few minutes before machine washing in cold water with light detergent.  Dry and press.  Feel free to work on the interior of the bag while the exterior is drying. Move on to step 5 if desired.

I used painters tape to attach my fabric to a yard stick.  I want to start with about 2 inches of fabric in the dye so I taped accordingly.  In order to try to keep the two sides even, I put both on the same stick on opposite sides.  

I was dying two, as you see here.  My fabric was a little wider than my tub so I started by doing the center...

...and then shifted the yard sticks to do the sides after about five minutes.  After another five minutes, I shifted it again to get the other edge.  

Step Four- Give that bag a trim

Lay your pattern (or the already cut bag interior) back over your freshly dyed pieces.  Trim away the excess.

See all that excess?  Yeah, you want that gone.  I used my quilters Ruler and rotary cutter to trim away the straight parts....

...and then used my scissors to clip away those sexy curves. 

Step Five- Fusion

Fuse your interfacing to all of the pieces.  Here is where I deviated a little from the instructions:  I added interfacing to the bag lining.  Why?  1) The original pattern/tutorial uses all home decor weight fabrics.  I didn't.  2) I prefer a sturdier lining in my bag to support all the crap I carry around.  If you are using quilting weight cotton, I recommend using the interfacing.

Note:  The yoke and exterior bag pieces will get both interfacing and fusible fleece.  Do the interfacing first, and then the fleece.  

Step Six- Get your pleat on

So I mentioned briefly that you could work on the interior the bag while your dyed pieces were drying.  That's what I did.  The pattern directions are kind of none specific about the pleats.  I did four pleats, each 1 1/4" deep moving from the center out (see pictures).  You will pleat both the interior and exterior in the same manner.

So I marked my pleats on one of my interior pieces (this is only one side.  I made a total of 4 marks on each).  Then I lined up those marks with my other pieces for uniformity.  

The pleats all pinned in, looking from the wrong side.  Notice anything incorrect here?  Yeah, I forgot to fuse on the interfacing and fleece on my exterior fabric before I pleated.  I removed the pins, fused, and redid it the way I told you to.  

Step Seven- Pockets full of Sunshine

Follow pattern directions for making the pockets.  Again, because I prefer a sturdy interior, I interfaced all of the pocket pieces.  Make yourself a sandwich (a fabric sandwich) and stitch around the outside using a 3/8" seam allowance and leaving a gap to turn the pocket right side out.  Turn right side out, press, and top stitch according to pattern directions.  Then pin and stitch the pockets according to pattern directions.  (Yes, I'm feeling too lazy to give you every single detail on how to do this.  Deal with it).

Step Eight- Interior Decorating

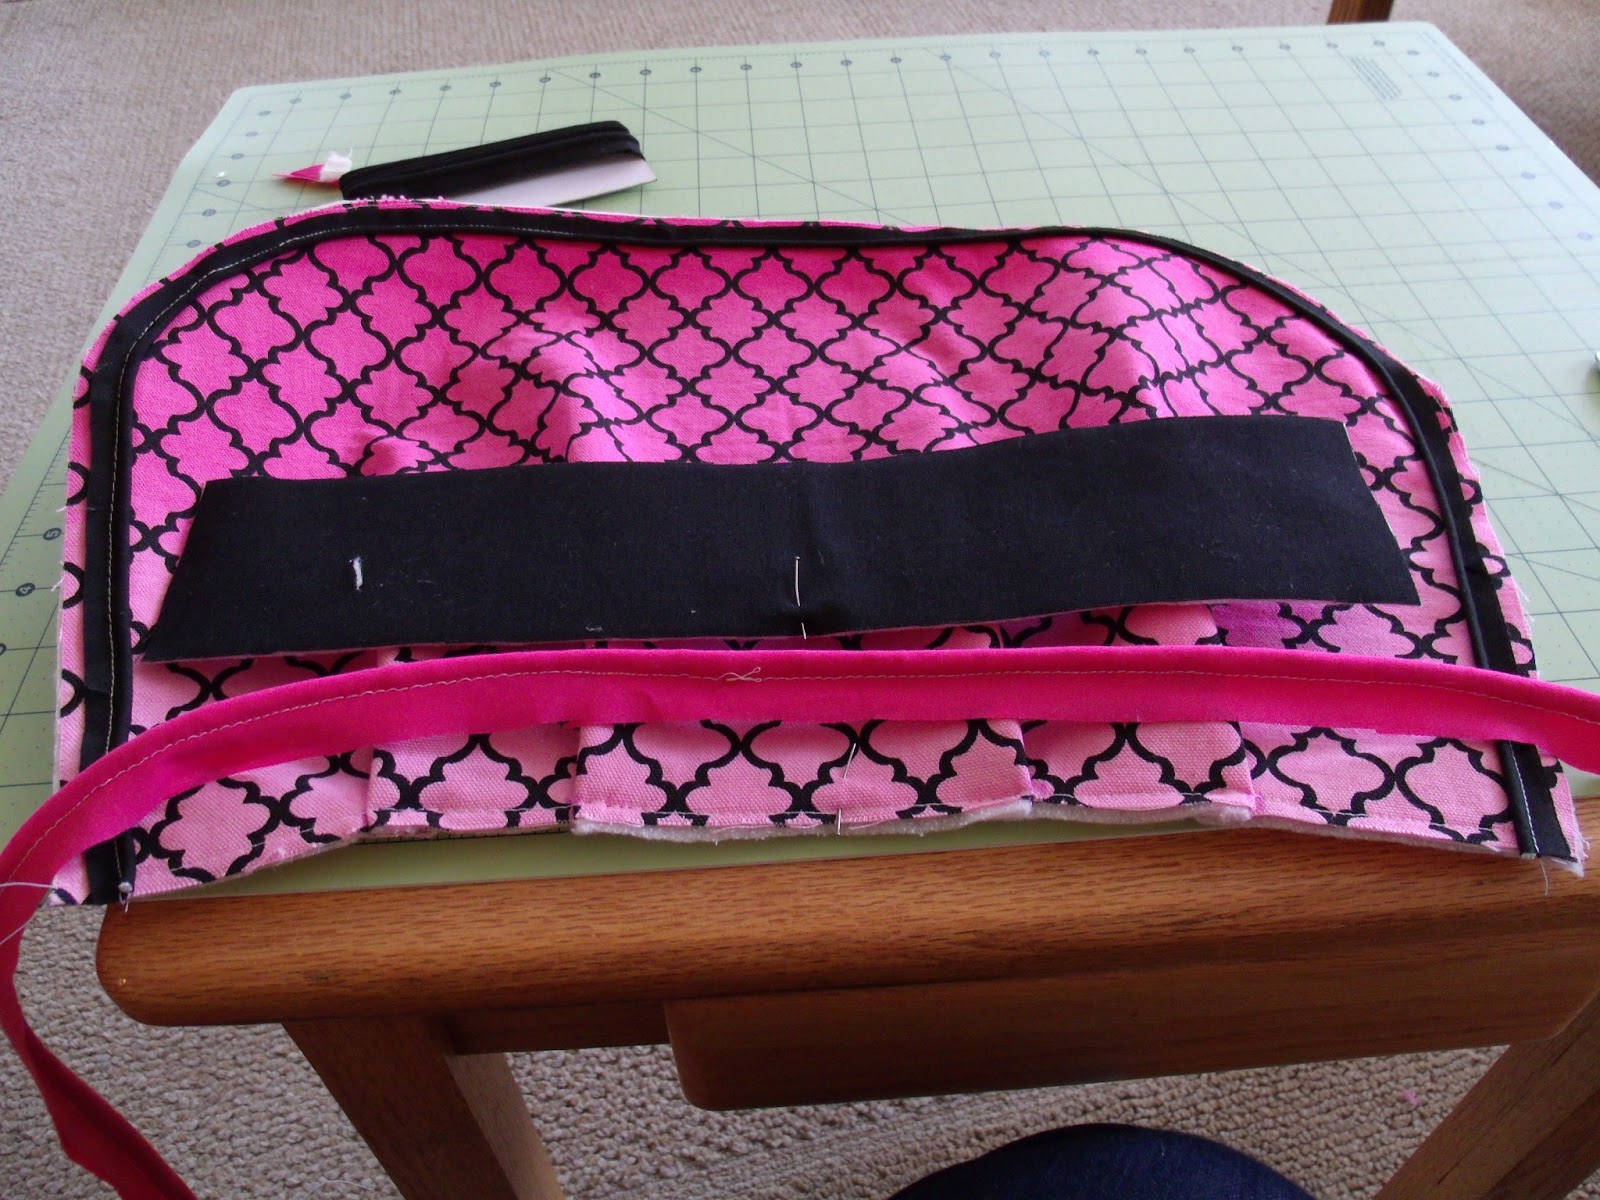
So here is another place where I deviated from the pattern:  I used black cotton strapping and I attached them just below the yoke on the interior of the bag.  I prefer this look but you may not.  Whatever.  I used my dress makers marker and placed the straps 4 inches from the outside edges of the bag.  Make another (fabric) sandwich like so:  bag interior right side up, straps (make sure they aren't twisted), and yoke wrong side up.  Pin, stitch, and press seam open.

Step Nine- Plumbing--er, piping

Grab your piping and get ready to make some magic.  I used two different colors of piping:  the black which I bought in a package, and the pink which I made using my gorgeous welting foot.  Now, this pattern calls for 1/2" seam allowances and my premade piping had 1/4" seam allowances so I measured and placed very carefully before stitching it down.  Then I stitched my pink piping to the yoke pieces.  It should be noted that I used my welting foot while working on all the piping.  The welting foot snuggles over the piping making sure you stitch closely beside it and not through the piping.  If you don't have a welting foot, consider using your zipper foot which will more easily allow you to sew closely to the piping.  When the piping is done, attach the yoke pieces to the bag exterior

Pin your piping to the perimeter of ONE of your exterior pieces.  Stitch it down.  

Line up your top piping and cut to approximate length.  My homemade piping had  1/2" seam allowances so that worked out well.  

I marked the centers on my bag exterior and yoke before beginning to pin.  Pin everything and stitch it down.  You can either stitch your piping down and THEN stitch on the yoke, or you can do it in one swell foop (as my music theory prof used to say...)

Press it so it looks nice and pretty.  Attach top piping and yoke to other side as well (dur).  

Step Ten- Double Bagging it

Using 1/2" seam allowances, stitch bag exterior, right sides together.  Turn right side out and press.  Using the same 1/2" seam allowance, stitch the bag interior right sides together.  LEAVE A SIX INCH GAP AT THE BOTTOM TO BE ABLE TO TURN IT RIGHT SIDE OUT LATER.  Press the seams on both bags.  

Tip #1:  Use painters tape to mark the seam allowance on the deck of your sewing machine rather than just winging it.  Precision counts.  

Tip #2:  When sewing the exterior of the bag, I continued to use my welting foot to avoid stitching over the piping.  

Pin right sides together and stitch.  

Another tip:  I stitched over top of my piping stitch line so everything would line up and I wouldn't stitch over the piping.  

Step Eleven- Come together, right now, over me

Turn your exterior right side out and your lining inside out.  Insert the exterior into the interior (I know, this sounds confusing but just trust me).  Pin in place, making sure your seams are lined up (dur). Use a half inch seam allowance, and stitch around the top.  Pull the bag exterior through the hole you left in the interior until the whole thing is right side out.  Stitch up the hole by whatever means you prefer.  

Note:  In a lot of bags, I have top-stitched these holes closed and been dissatisfied later.  So this time, I took the time to invisible stitch it closed by hand.  It took ten minutes and I will always be grateful that I did it.  This bag will last a lot longer than ten minutes.

Yes.  Pin it like this.  Like the original tutorial suggests, stitch with the thickest material (aka the exterior) on top.  Turn right side out and you will start to see something that Looks like the picture...

Step Twelve- Finishing touches

Push the lining into the bag and then press the yoke.  Now it is time to top stitch.  I did two rows of top stitching:  1 row 1/4" from the top of the yoke and 1 row 1/4" from the bottom of the yoke.  

Step Thirteen (optional)- Weather insurance

I am a big fan of making things last and making sure that my expensive electronics don't get ruined if I trip and drop my purse in a puddle.  This water proofing spray (purchased at walmart) is relatively cheap insurance.  I spent $7 on the can which has also served to waterproof a few pairs of shoes and a table cloth. Take your bag outside and spray until the fabric looks wet.  Then allow the bag to air dry for at least 24 hours before you take it out on the town.  The coating does not change the color of the fabric and it is odorless BUT ONLY AFTER IT IS 100% CURED.  

...I made the mistake on the drying time thing and it stunk up my car pretty good.  I was worried that this was permanent but then the next day the smell was 100% gone.

This is the stuff I used.  It has a neon orange cap and I found it in the camping section at Walmart.  

Step Fourteen- What we wanted all along...

Stuff your bag full of your stuff and enjoy it, lady!  You worked hard!

hanging from a tree outside as the waterproofing dries...
and stuffed full of crap, ready to go!

Admire that gorgeous ombre!


If you have any comments or questions, please drop me a line.  :)  I'd love to hear what you all think.


P.S.  If you absolutely love my bag and don't feel like making your own, I will have a duplicate up on Etsy in the next few days.  :)

Saturday, March 30, 2013

Simple Table Runner Tutorial

So the big family Easter is at the Wasson house this weekend, which means we will have 18 people in house on Sunday afternoon to celebrate the risen Christ with lots of food.  In honor of the occasion, Mom wanted new table runners.  Rather than spending a small fortune (because she needs three since our family cannot be accommodated at our dining room table alone), I decide to whip them up for her with my mad sewing skillz. For anyone who is in the same boat, I am giving you the directions on how to do the same thing.


Materials Needed: 

Thread
Heavy weight fusible interfacing (I used Pellon.  I used about 4.5 yards for my projects)
Fabric

Note:  I made three runners of three different sizes.  1- 14.5" x 72"  1-14.5" x 60" and 1-24" x 24"  (it's a square but we'll call it a runner anyway).  For these three, I purchases 3.5 yards of fabric A  and 2.75 yards of fabric B.  I had a lot of scraps left over to make other things.  Unless you want a seam in the middle of your runner, purchase a length of fabric that is slightly longer than your finished length.  I.E.  If you want a 60" runner, go ahead and purchase 2 yards of fabric.  Between squaring the edges and seam allowances, you'll need the few extra inches.

Step One

Pre-wash, press, and square your fabric.  DO NOT SKIP THE PRE-WASHING.  This is going on your table.  During a meal.  If your family is anything like mine, there will be food splotches on the runner, even if you are serving PB&J for Easter.  You'll want to be able to wash your runner without it shrinking.  Prewash and you won't have to worry about your runner suddenly becoming a different shape in the wash.  

Most fabrics will come out of the drier crumpled, wrinkly, and possibly smaller than when they went in.  You will need to press the fabric, even if it looks okay.  Just take the time and do it right.  I am the queen of skipped steps and usually live to regret it.  Learn from my errors.  

You will also want to square up the ends of your fabric, as I doubt that it was cut absolutely perfectly in the store.  If you don't know how to do that, I recommend THIS tutorial for detailed instructions.  

Step Two

Cut your fabric and interfacing to the dimensions you want, plus seam allowances.  So for my big runner, I wanted to finished dimensions to be 15.5 x 72.  I used a generous .5" seam allowance on all sides so I cut my fabric to 16.5" x 73".  

Hint:  I did not want my edges and corners to be bulky.  In order to de-bulk the edges and corners, I made some adjustments in how I cut the interfacing.  I cut the interfacing to 16" x 72.5", giving myself an extra 1/4 inch all the way around on the fabric.  I also notched my corners on my interfacing so there would be less bulk when all is said and done.


See that notch in the corner?  Yeah, that's what you want.  

Step Three

Fuse interfacing to the wrong side of top fabric.  Interfacing comes with fusing instructions but I'll outline the basics for you here.  I greatly prefer fusible to sewn in because it is easier to use.  Press and go.  I like that.  

Lay fabric wrong-side up on ironing board

Lay interfacing dot side down over top of fabric, lining it up. Notice that my interfacing is slightly smaller.  This will de-bulk my side seams.   

Look at it all nice and lined up and stuff.  

Press firmly with the iron, using steam.  This will melt those little dots and fuse it to your fabric.  Fuse all the way down, making sure the edges aren't peeling up.  

Step Four (optional)

Realize you forgot to prewash your contrasting fabric.  Throw that in washer and decide you've had enough sewing for one evening.  Watch HGTV until brain melts.  Sleep and wake up ready to sew--well, after a few cups of coffee, of course.  Consider getting dressed.  Decide that your sewing machine doesn't care if you are in your pajamas.  Get back to work.  

Step Five

Make yourself a sandwich--a fabric sandwich, that is.  Line up your fabrics with the right sides together.  My sandwich was like this:  Interfacing/Fabric A with pattern up, Fabric B.  Pin fabric together.


I usually mark where the opening will be by positioning my pins like so.  I know it's hard to see in the image (sorry!) but two pins are placed parallel to the edge of the fabric where the opening will be.  

Step Six

Stitch the perimeter using half inch seam allowances, leaving a gap to turn right side out.  If you have far more patience than me, you can hand sew but I used my machine.  Before turning the fabric right side out, I do one more step to help make my corners sharp.

Sorry for the blurry but you can kind of see that instead of 45ing my corners off, I clipped them very close to the stitching and tapered them off toward the edge.  

Step Seven

Turn whole thing right side out.  It will look rather silly but you aren't done yet so don't fret!  

See?  What did I just say?  Very silly indeed.  

Step Eight

Press the bejeezuz out of that thing.  I start by sticking my arm all up in that thing and pushing out all of the corners.  I will often use a sharp stick to poke them out, if that makes sense.  Then press the living daylights out of it so it lays nice a flat with straight sides.  

That almost looks like something I would put on my table now.  

Step Nine 

Top stitch around the edges.  I used one of the decorative stitch options on my machine.  This step is technically optional but it will make it look nicer and come out better in the wash.  I wish I had pictures of this step but alas, they were all way out of focus.  

This is the point in my runner making where I decided it might be time to put on pants since it was past noon and I was going to take pictures in our dining room that has lots of windows and other reflective surfaces.  Ah well.  I suppose we all have to put on our big girl clothes at some point.  


And there you have it folks.  So quick and easy you could whip it up today for tomorrow's Easter dinner.  Hope you enjoyed!


Sunday, December 16, 2012

Holiday Placemat Tutorial


Hello my dear crafters! This post was originally to Sugar Bee Crafts as part of Mandy's Holiday Guest posting extravaganza.  To see the original, please look there, but this one contains updated photos.  


Materials Needed:

1 yard each of four different coordinating fabric
2 yards of a coordinating fabric for the back side of the placemats and runner
Interfacing, iron on or sewn in (I used about 5 yards since it is only 20 inches wide)
6 packs of ½ inch double fold bias tape
Sewing machine
adjustable binding foot like THIS
Or, alternatively, patience in attaching binding without one


Step One

Pick out a pile of gorgeous fabrics from your local store. I suggest four for the top of your place mats and then one for the backing. I purchased one yard of each of the top fabrics and two yards of my backing fabric.

The bottom fabric is my backing and the top four I used on the top


Step Two

Pre-wash, dry, and iron your fabrics. Then trim your selvedge edges.

Step Three

Let's talk math. My place mats are 14 by 18 inches. This pattern uses quarter inch seam allowances so the strips are cut to 3 ½ x 14 inches to allow for seam allowances. I decided to make six place mats and a table runner that is five feet long. You need fourteen 14 x 3 ½ inch strips of each of the four “top” fabrics to make what is shown.

Note Here: In a perfect world, everyone who have a cutting mat, rotary cutter, and quilting ruler. Mine is currently in the mail so I completed this using a yardstick, scissors, and a carpenters square.

Step Four

Press each piece and place the pieces in the order they will be sewn together. I then grouped them so I had six pieces for each place mat and twenty pieces for my runner.

My fabrics nice and cut, ironed, and organized. 


Step Five

Start pinning. I prefer to pin all of my seams together for each place mat and then sew everything at once, rather than pinning as I go. Pin wrong side to wrong side, going in a row as shown below.

Place your second piece on top of your first, wrongsides out.  Pin along top.

Open up the fabric

Pin piece three to piece two and repeat the process until all pieces are pinned.  


Step Six

Stitch each seam, removing pins as you go and then press all the seams and if you, like me, were less than perfect with your measuring and cutting, trim the edges so they are all even.

My seams, some pressed and others waiting for my nice hot iron

Step Seven

Cut your interfacing and fuse to place mat according to package directions 

The wrong side of my place mat with interfacing fused on.  Word to the wise:  Make sure the side with all the little dots is facing your fabric.  I almost fused this to my iron...


Step Eight

Cut backing fabric to match and then pin all layers together. At this point, use safety pins in the middles of your rectangles since you are going to be quilting soon. 

See all my layers just waiting to be sewed together?  So close to finished!  

Step Nine

Attach your binding.  There are many tutorials that explain this much better than I can.  THIS one explains how to use a binding foot and THIS tells you how to attach double fold binding tape using a standard presser foot.  It takes patience.  

Step Ten

"Quilt" your place mats. I chose to do a simple outline of each block. 

Ain't it purty?  


Bonus:  Step Eleven

If you like the detailed edge finish of my final place mat, I achieved this look by using one of the embroidery functions on my sewing machine.  I have a Singer Confidence.  

I hope you enjoyed this tutorial and will visit me at my blog Songbird Takes Flight.  If you like the "snowballs" in the centerpiece, there is a tutorial to make them and faux mercury glass ornaments in my blog.  

~ Caitlin

P.S.  Special Thanks to Mandy for the opportunity to share this tutorial with all of you.  :)


Tuesday, November 13, 2012

Tutorial: Decorative Snowballs

Greetings my darling readers.  If you are reading for the first time, welcome to my crazy life.  All of you should feel free to follow me.  I have a fair number of tutorials coming up, a lot of which are for Christmas.  Today, I will start with my tutorial on making decorative Snowballs.


Materials Needed:


Epsom salts
Mod Podge 
3" Styrofoam balls (or whatever size you like)
Small paint brush 
Paper plate or other shallow dish 
Bamboo skewers 

Step One

Begin by covering your work surface with wax paper or some other waterproof guard.  I will explain why later.  

Step Two

Pour a cup or so of epsom salts onto your paper plate.

I added a few tablespoons of table salt to my epsom salts

Step Three

Skewer your Styrofoam balls onto your bamboo skewers so they are secure and you essentially have giant lollipops.


Step Four

Paint the outside of your ball in mod podge and roll in your epsom salts.  Helpful Hint: If you want to cover the whole ball in one shot, sprinkle pinches of the salt over the hard to cover areas and gently press.

sorry for the low Q.  Took all photos on my cell phone.  

Again, sorry for the low Q, but you get the idea, right?

A close up of my finished ball... 

Step Five

Put your skewers snowballs into a vase or other container and allow to dry over your protected surface.

I even put them in a nice festive vase...

Important Project Note

The reason it is so important that you cover your surface with something waterproof is because these balls will drip water while drying.  The epsom salts will leech some of the water from the glue and drip onto the table.  It will not affect the finish of the snowballs but it will cause a mess if you aren't careful.

See my drips on my wax paper?  Some how I don't think my Mom would be happy with that  on her antique hardwood table... 

Step Six

When your snowballs are completely dry, remove the skewers from the ball.  If the little holes in the balls bother you, add a small dab of glue and sprinkle on more epsom salts to hide the hole.  

See?  Doesn't the texture look like ice?  As the epsom salts are exposed to air, they will lose some sparkle but the texture still looks lovely and snow-like.  

I hope you enjoyed this tutorial.  It's pretty simple and I'm sure you could've figured it out yourselves but I thought I would share with you my latest projects.  :)  Tell me what you think in a comment!